Anireel User Guide for Windows
Find an easy way to create riveting animated explainer videos.
User Guide
-
Get Started
-
Basic Editing
-
Advanced Editing
-
Save and Export
-
Video Templates
- Video Template: Travel Service
- Anireel Templates Project
- Video Template: Real Estate Service
- Video Template: Business and Financial Consulting Services
- Video Template: Summer Sale Ads
- Video Template: Python Course Promotion
- Video Template: Car Rental Service
- Video Template: Java Program Service
- Video Template: English Online Learning
- Video Template: Content Creation Service
- Video Template: Mobile App Promotion
- Education Class Video Template
- Video Template: Cake Order Service
- Animition Video Skills Sharing Video Template
- Book Recommendation Video Template
- Brand Explainer Video Video Template
- Certification Consulting Services Video Template
- Company Event Invitation Video Template
- corporate communication Video Template
- D-mannos Popular Science Video Template
- Education and Training Video Template
- Fishing Machine Service Video Template
- Flight Reservation Service Video Template
- Floor System Service Video Template
- Food Company Introduction Video Template
- Health Product Promotion Video Template
- Housing and Education Counseling Video Template
- Innovation Solution Video Template
- Insurance Introduction Video Template
- OSHA Consulting Service Video Template
- Push Notification Service Video Template
- Service Introduction Video Template
- Sleep Therapy Training Video Template
- Training Solution Video Template
- Transportation Solution Video Template
Anireel Manual PDF
Text to Speech
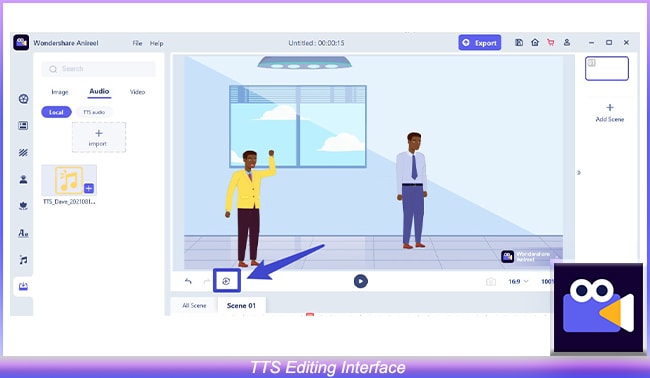
1. Entry
You can enter the TTS editing interface in the following ways:
- ❶ Toolbar → TTS
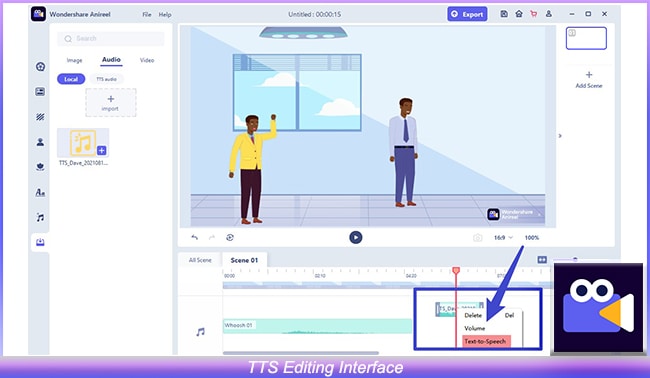
- ❷ Timeline → Audio → Generate TTS Audio → Add to Timeline → Right Click TTS Audio → Text-to-Speech
2. TTS Generation and Timeline Adding
You will receive 2000 experience characters for free at your first use experience to TTS.
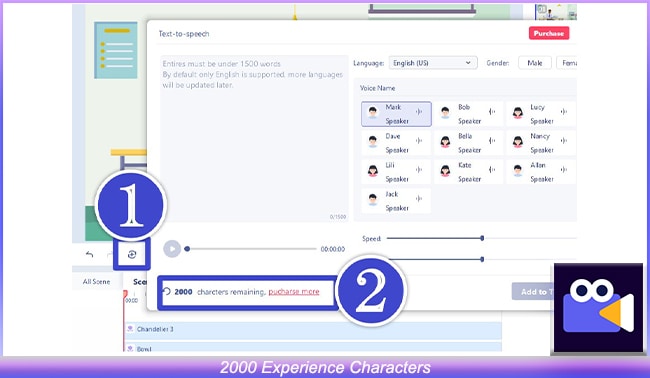
In the TTS editing interface, you can choose your favorite vocals for audition. Enter the text you want to convert into audio, and set the appropriate volume, speed, and pitch.
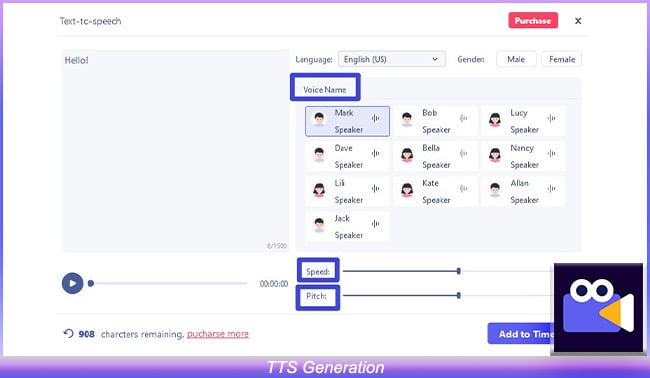
Click Generate, your TTS audio will be stored in "Import → Audio" in the resource area. Click "Add to Timeline" and the generated TTS will be placed on the timeline track.

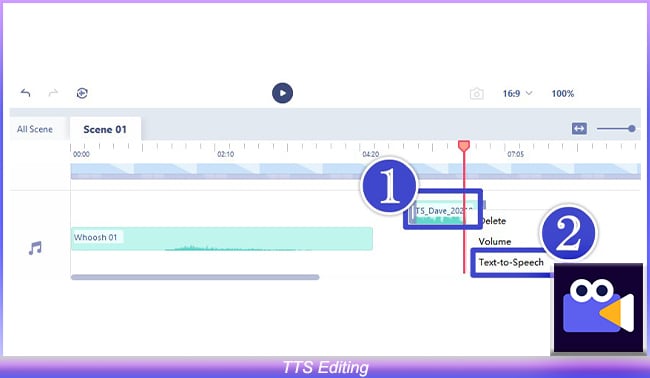
3. TTS Editing
If you want to edit the generated TTS, right-click the TTS audio clip on the timeline and click "Text-to-Speech".